As a novice web developer, you’ve built your portfolio app and shared your code on GitHub. Perhaps, you’re hoping to attract technical recruiters to land your first programming job. Many coding bootcamp graduates are likely doing the same thing. To differentiate yourself from the crowd and boost your chances of getting noticed, you can start hosting your Django project online.
For a hobby Django project, you’ll want a hosting service that’s free of charge, quick to set up, user-friendly, and well-integrated with your existing technology stack. While GitHub Pages is perfect for hosting static websites and websites with JavaScript, you’ll need a web server to run your Flask or Django project.
There are a few major cloud platform providers operating in different models, but you’re going to explore Heroku in this tutorial. It ticks all the boxes—it’s free, quick to set up, user-friendly, and well-integrated with Django—and is the favorite cloud platform provider of many startups.
In this tutorial, you’ll learn how to:
- Take your Django project online in minutes
- Deploy your project to Heroku using Git
- Use a Django-Heroku integration library
- Hook your Django project up to a standalone relational database
- Manage the configuration along with sensitive data
To follow along, you can download the code and other resources by clicking the link below:
Get Source Code: Click here to get the companion Django project as well as snapshots of the individual steps followed in this tutorial.
Demo: What You’ll Build
You’re going to create a bare-bones Django project and deploy it to the cloud straight from the terminal. By the end, you’ll have a public and shareable link to your first Heroku app.
Here’s a one-minute video demonstrating the necessary steps, from initializing an empty Git repository to viewing your finished project in the browser. Hang on and watch till the end for a quick preview of what you’re about to find in this tutorial:
In addition to the steps shown in the screencast above, you’ll find a few more later on, but this should be enough to give you a general idea about how you’ll be working with Heroku in this tutorial.
Project Overview
This tutorial isn’t so much about building any particular project, but rather hosting one in the cloud using Heroku. While Heroku supports various languages and web frameworks, you’ll stick to Python and Django. Don’t worry if you don’t have any Django projects on hand. The first step will walk you through scaffolding a new Django project to get you started quickly. Alternatively, you can use a ready-made sample project that you’ll find later.
Once you have your Django project ready, you’re going to sign up for a free Heroku account. Next, you’ll download a convenient command-line tool that will help you manage your apps online. As demonstrated in the screencast above, the command line is a quick way of working with Heroku. Finally, you’ll finish off with a deployed Django project hosted on your newly-configured Heroku instance. You can think of your final result as a placeholder for your future project ideas.
Prerequisites
Before jumping ahead, make sure that you’re familiar with the basics of the Django web framework and that you’re comfortable using it to set up a bare-bones project.
Note: If you’re more experienced with Flask than Django, then you can check out a similar tutorial about Deploying a Python Flask Example Application Using Heroku.
You should also have a Git client installed and configured so that you can interact conveniently with the Heroku platform from the command line. Finally, you should seriously consider using a virtual environment for your project. If you don’t already have a specific virtual environment tool in mind, you’ll find some options in this tutorial soon.
Step 1: Scaffold a Django Project for Hosting
To host a Django web application in the cloud, you need a working Django project. For the purposes of this tutorial, it doesn’t have to be elaborate. Feel free to use one of your hobby projects or to build a sample portfolio app if you’re short on time, and then skip ahead to creating your local Git repository. Otherwise, stick around to make a brand new project from scratch.
Create a Virtual Environment
It’s a good habit to start every project by creating an isolated virtual environment that won’t be shared with other projects. This can keep your dependencies organized and help avoid package version conflicts. Some dependency managers and packaging tools like Pipenv or poetry automatically create and manage virtual environments for you to follow best practices. Many IDEs like PyCharm do this by default, too, when you’re starting a new project.
However, the most reliable and portable way of creating a Python virtual environment is to do it manually from the command line. You can use an external tool such as virtualenvwrapper or call the built-in venv module directly. While virtualenvwrapper keeps all environments in a predefined parent folder, venv expects you to specify a folder for every environment separately.
You’ll be using the standard venv module in this tutorial. It’s customary to place the virtual environment in the project root folder, so let’s make one first and change the working directory to it:
$ mkdir portfolio-project
$ cd portfolio-project/
You’re now in the portfolio-project folder, which will be the home for your project. To create a virtual environment here, just run the venv module and provide a path for your new environment. By default, the folder name will become the environment’s name. If you want to, you can instead give it a custom name with the optional --prompt argument:
$ python3 -m venv ./venv --prompt portfolio
A path starting with a leading dot (.) indicates that it’s relative to the current working directory. While not mandatory, this dot clearly shows your intent. Either way, this command should create a venv subdirectory in your portfolio-project root directory:
portfolio-project/
│
└── venv/
This new subdirectory contains a copy of the Python interpreter along with a few management scripts. You’re now ready to install project dependencies into it.
Install Project Dependencies
Most real-life projects depend on external libraries. Django is a third-party web framework and doesn’t ship with Python out-of-the-box. You must install it along with its own dependencies in your project’s virtual environment.
Don’t forget to activate your virtual environment if you haven’t already. To do so, you’ll need to execute the commands in one of the shell scripts available in the virtual environment’s bin/ subfolder. For example, if you’re using Bash, then source the activate script:
$ source venv/bin/activate
The shell prompt should now display a prefix with your virtual environment’s name to indicate it’s activated. You can double-check which executables the specific commands are pointing to:
(portfolio) $ which python
/home/jdoe/portfolio-project/venv/bin/python
The above output confirms that running python will execute the corresponding file located in your virtual environment. Now, let’s install the dependencies for your Django project.
You’ll need a fairly recent version of Django. Depending on when you’re reading this, there might be a newer version available. To avoid potential compatibility problems, you may want to specify the same version as the one used at the time of writing this tutorial:
(portfolio) $ python -m pip install django==3.2.5
This will install the 3.2.5 release of Django. Package names are case insensitive, so it doesn’t matter whether you type django or Django, for example.
Note: Sometimes, you’ll see a warning about a newer version of pip being available. It’s usually harmless to ignore this warning, but you’ll need to consider upgrading for security reasons if you’re in a production environment:
(portfolio) $ python -m pip install --upgrade pip
Alternatively, you can disable the version check in the configuration file if it’s bothering you and you’re aware of the possible consequences.
Installing Django brings a few additional transitive dependencies, which you can reveal by listing them:
(portfolio) $ python -m pip list
Package    Version
---------- -------
asgiref    3.4.1
Django     3.2.5
pip        21.1.3
pytz       2021.1
setuptools 56.0.0
sqlparse   0.4.1
Since you want others to be able to download and run your code without problems, you need to ensure repeatable builds. That’s what freezing is for. It outputs roughly the same set of dependencies with their sub-dependencies in a special format:
(portfolio) $ python -m pip freeze
asgiref==3.4.1
Django==3.2.5
pytz==2021.1
sqlparse==0.4.1
These are essentially the arguments to the pip install command. However, they’re usually encapsulated within one or more requirements files that pip can consume in one go. To create such a file, you can redirect the output of the freeze command:
(portfolio) $ python -m pip freeze > requirements.txt
This file should be committed to your Git repository so that others can install its contents using pip in the following way:
(portfolio) $ python -m pip install -r requirements.txt
At the moment, your only dependency is Django and its sub-dependencies. However, you must remember to regenerate and commit the requirements file every time you add or remove any dependencies. This is where the package managers mentioned earlier might come in handy.
With that out of the way, let’s start a new Django project!
Bootstrap a Django Project
Every Django project consists of similar files and folders that follow certain naming conventions. You could make those files and folders by hand, but it’s usually quicker and more convenient to do in an automated way.
When you install Django, it provides a command-line utility for administrative tasks such as bootstrapping new projects. The tool is located in your virtual environment’s bin/ subfolder:
(portfolio) $ which django-admin
/home/jdoe/portfolio-project/venv/bin/django-admin
You can run it in the shell and pass the name of your new project as well as the destination directory where it’ll create the default files and folders:
(portfolio) $ django-admin startproject portfolio .
Alternatively, you could achieve the same result by calling the django module:
(portfolio) $ python -m django startproject portfolio .
Notice the dot at the end of both commands, which indicates your current working directory, portfolio-project, as the destination. Without it, the command would create another parent folder with the same name as your project.
If you’re getting a command not found error or ModuleNotFound exception, then make sure you’ve activated the same virtual environment where you installed Django. Some other common mistakes are naming your project the same as one of the built-in objects or not using a valid Python identifier.
Note: Starting a new Django project from scratch with the administrative tools is quick and flexible but requires a lot of manual labor down the road. If you’re planning to host a production-grade web application, then you’ll need to configure security, data sources, and much more. Choosing a project template that follows best practices might save you some headaches.
Afterward, you should have this directory layout:
portfolio-project/
│
├── portfolio/
│   ├── __init__.py
│   ├── asgi.py
│   ├── settings.py
│   ├── urls.py
│   └── wsgi.py
│
├── venv/
│
├── manage.py
└── requirements.txt
You created a management app named portfolio, which contains project-level settings and the main file with URL patterns, among a few other things. You also created the manage.py script that conveniently wraps django-admin and hooks up to your project.
You now have a bare-bones yet runnable Django project. At this point, you would typically start one or more Django apps and define their views and models, but they aren’t necessary for this tutorial.
Update Local Database Schema (Optional)
This step is optional, but if you want to use the Django admin view or define custom apps and models, then you’ll eventually need to update your database schema. By default, Django brings a file-based SQLite database, which is convenient for testing and running a local development server. This way, you don’t need to install and set up a full-blown database like MySQL or PostgreSQL.
To update the database schema, run the migrate subcommand:
(portfolio) $ python manage.py migrate
After successfully applying all pending migrations, you’ll find a new file named db.sqlite3 in your project root folder:
portfolio-project/
│
├── portfolio/
│   ├── __init__.py
│   ├── asgi.py
│   ├── settings.py
│   ├── urls.py
│   └── wsgi.py
│
├── venv/
│
├── db.sqlite3
├── manage.py
└── requirements.txt
You can inspect its contents with the sqlite3 command-line utility, Python’s built-in sqlite3 module, or your favorite database administration tool. By now, this file should contain a few tables for the internal apps responsible for authentication, session management, and so on, as well as a metatable to keep track of the applied migrations.
Run a Local Development Server
Before increasing the complexity by throwing Heroku on top of your project, it makes sense to test everything out on a local computer. This may spare you a lot of unnecessary debugging. Fortunately, Django comes with a lightweight web server for development purposes, which requires little to no configuration.
Note: Technically, you can take advantage of the same development server built into Django on Heroku. However, it wasn’t designed to handle real-life traffic, nor is it secure. You’re better off using a WSGI server like Gunicorn.
To run the development server, type the following command in your terminal window where you activated the virtual environment before:
(portfolio) $ python manage.py runserver
It will start the server on localhost port 8000 by default. You can adjust the port number if another application is already using 8000. The server will keep watching for changes in the project source files and automatically reload them when necessary. While the server is still running, navigate to the URL in your web browser:
http://127.0.0.1:8000/
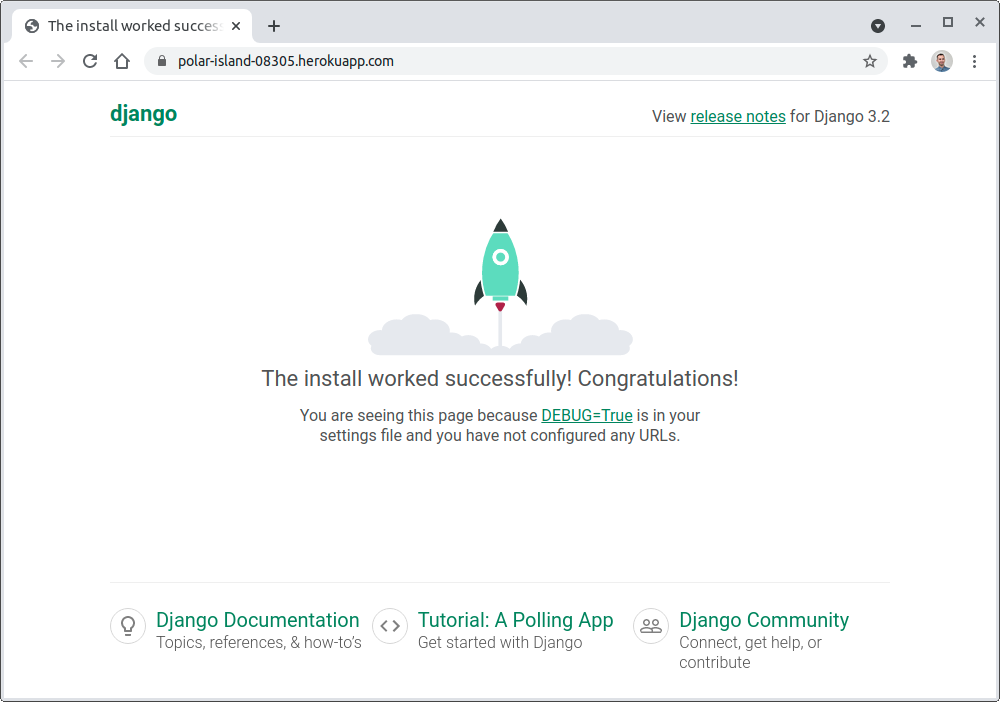
The host 127.0.0.1 represents one of the IP addresses on the virtual local network interface. If everything went fine and you haven’t changed the default project settings, then you should land on the Django welcome page:
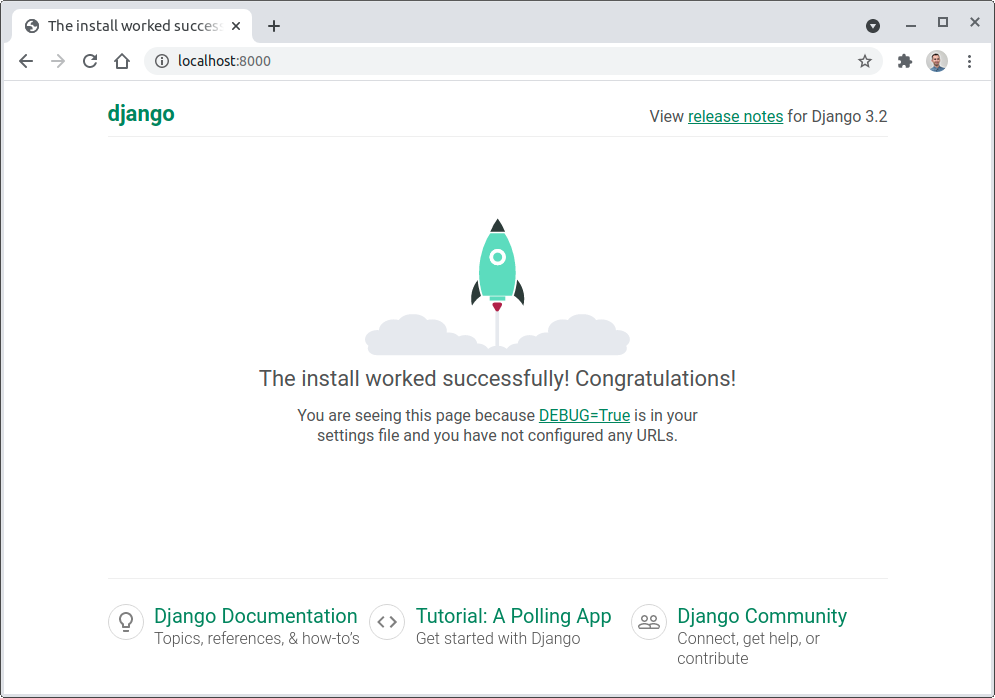
Hooray! The rocket has taken off, and your Django project is ready for deployment in the cloud.
Step 2: Create a Local Git Repository
Now that you have a working Django project in place, it’s time to take the next step towards hosting it in the cloud. In this section, you’ll explore the available options for building and deploying applications on the Heroku platform. You’ll also create a local Git repository for your project if you haven’t already. At the end of this step, you’ll be ready to deep dive into the Heroku toolchain.
Heroku offers at least five different ways to deploy your project:
- Git: Push commits to a remote Git repository on Heroku
- GitHub: Automatically trigger deployment when a pull request is merged
- Docker: Push Docker images to the Heroku container registry
- API: Automate your deployment programmatically
- Web: Deploy manually from the Heroku dashboard
The most straightforward and developer-centric method is the first one. Many software developers already use Git on a daily basis, so the entry barrier to Heroku can be pretty low. The git command lets you accomplish a lot in Heroku, which is why you’re going to use Git in this tutorial.
Initialize an Empty Git Repository
Stop your development server with the key combination Ctrl+C or Cmd+C or open another terminal window, then initialize a local Git repository in your project root folder:
$ git init
It doesn’t matter whether your virtual environment is active or not for this to work. It should create a new .git subfolder, which will contain the history of the files tracked by Git. Folders whose names start with a dot are hidden on macOS and Linux. If you want to check that you created it successfully, then use the ls -a command to see this folder.
Specify Untracked Files
It’s useful to tell Git which files to ignore so that it doesn’t track them anymore. Some files shouldn’t be part of the repository. You should usually ignore IDE and code editor settings, configuration files with sensitive data such as passwords, binary files like the Python virtual environment, cache files, and data like the SQLite database.
When you check the current status of your new Git repository, it will list all files present in the working directory and suggest adding them to the repository:
$ git status
On branch master

No commits yet

Untracked files:
  (use "git add <file>..." to include in what will be committed)
    .idea/
    __pycache__/
    db.sqlite3
    manage.py
    portfolio/
    requirements.txt
    venv/

nothing added to commit but untracked files present (use "git add" to track)
Instead of adding all of those files and folders, you’ll want to make Git ignore some of them, for example:
.idea/__pycache__/db.sqlite3venv/
The .idea/ folder is specific to PyCharm. If you’re using Visual Studio Code or another editor, then you’ll need to add their corresponding files and folders to this list. Including more filename patterns up front will let other contributors safely use the editors and IDEs of their choice without having to update the list too often.
Git looks for a special file called .gitignore, which is usually placed in your repository’s root folder. Each line contains a concrete filename or a generic filename pattern to exclude. You can edit this file by hand, but it’s much quicker to create one from a predefined set of components using the gitignore.io website:
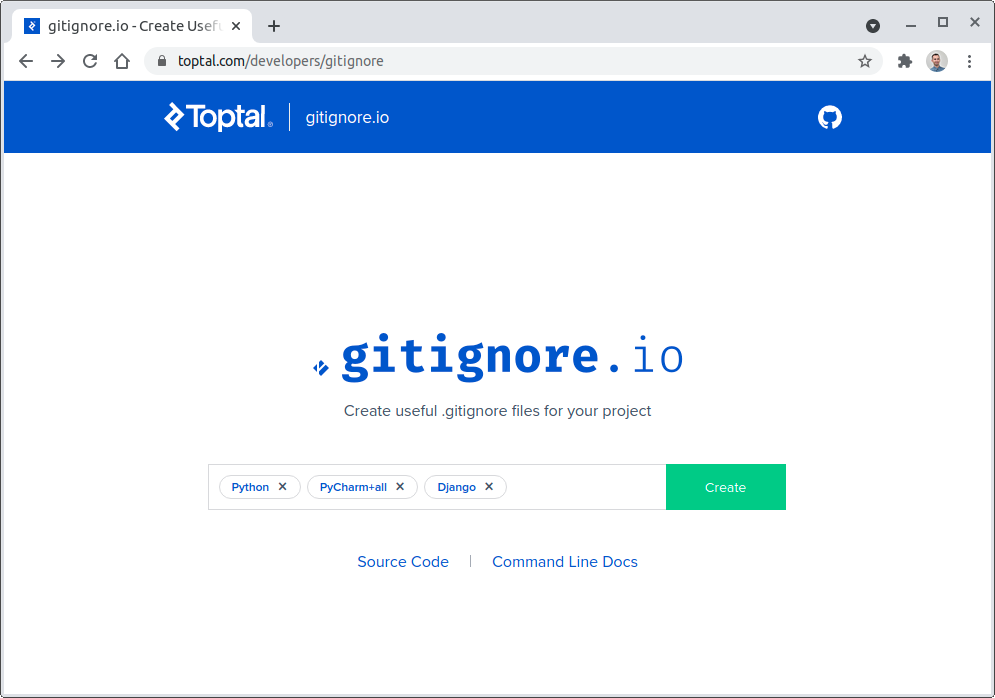
You’ll notice that typing gitignore.io into the address bar will redirect the browser to a more verbose domain owned by Toptal.
Here, you can choose the programming language, libraries, and tools you’re using. When you’re happy with your selection, click the Create button. Then, either copy and paste the result to a text editor and save it as .gitignore in your project root folder or note the URL and use cURL in the command line to download the file:
$ curl https://www.toptal.com/developers/gitignore/api/python,pycharm+all,django > .gitignore
If you find yourself typing this URL repeatedly, then you may consider defining an alias command in your shell, which should be easiest to remember:
$ git ignore python,pycharm+all,django > .gitignore
There are often multiple ways to achieve the same goal, and learning about the different options can teach you a lot. Either way, after creating the .gitignore file, your repository status should look like this:
$ git status
On branch master

No commits yet

Untracked files:
  (use "git add <file>..." to include in what will be committed)
    .gitignore
    manage.py
    portfolio/
    requirements.txt

nothing added to commit but untracked files present (use "git add" to track)
The remaining steps of creating a local Git repository are staging your changes and saving them in your first commit.
Make the First Commit
Remember that to work with Heroku through Git, you have to push your code to a remote Git repository. You need to have at least one commit in your local repository to do so. First, add your new files to the staging area, which is a buffer between your working tree and the local repository. Then, recheck the status to verify you haven’t missed anything:
$ git add .
$ git status
On branch master

No commits yet

Changes to be committed:
  (use "git rm --cached <file>..." to unstage)
    new file:   .gitignore
    new file:   manage.py
    new file:   portfolio/__init__.py
    new file:   portfolio/asgi.py
    new file:   portfolio/settings.py
    new file:   portfolio/urls.py
    new file:   portfolio/wsgi.py
    new file:   requirements.txt
These files are ready to be committed, so let’s take their snapshot and save them in a local repository:
$ git commit -m "Initial commit"
It’s always a good idea to provide a descriptive commit message to help you navigate the change history. As a rule of thumb, your message should explain why you made the change. After all, anyone can review the Git log to find out exactly what has changed.
Okay, so what have you learned so far? You know that deploying new releases to the Heroku platform usually involves pushing your local commits to a Git remote. You’ve created a local Git repository and made your first commit. Next, you need to create your free Heroku account.
Step 3: Create a Free Heroku Account
At this point, you’re ready to sign up for a free Heroku account and configure it to your liking.
Django advertises itself as the web framework for perfectionists with deadlines. Heroku takes a similar opinionated approach to hosting web applications in the cloud and aims to reduce development time. It’s a high-level and secure Platform as a Service (PaaS) that takes the burden of infrastructure management off your shoulders, letting you focus on what matters to you the most—writing code.
Fun Fact: Heroku is based on Amazon Web Services (AWS), another popular cloud platform operating mainly in an Infrastructure as a Service (IaaS) model. It’s much more flexible than Heroku and can be more affordable but requires a certain level of expertise.
Many startups and smaller companies don’t have a team of skilled DevOps engineers during their early stages of development. Heroku might be a convenient solution in terms of return on investment for those companies.
Sign Up
To start with Heroku, visit the Heroku sign-up page, fill in the registration form, and wait for an email with a link to confirm your account. It will take you to the password setup page. Once configured, you’ll be able to proceed to your new Heroku dashboard. The first thing you’ll be asked to do is to read and accept the terms of service.
Enable Multi-Factor Authentication (Optional)
This step is purely optional, but Heroku might nag you to enroll in multi-factor authentication (MFA) to increase the protection of your account and keep it secure. This feature is also known as two-factor authentication (2FA) because it typically consists of only two stages to verify your identity.
Fun Fact: My personal Netflix account got hacked at one point, and someone was able to use my credit card, even long after I canceled my subscription. Since then, I enable two-factor authentication in all of my online services.
When logged in to your Heroku dashboard, click your ninja avatar in the top-right corner, choose Account Settings, and then scroll down until you can see the Multi-Factor Authentication section. Click the button labeled Setup Multi-Factor Authentication and choose your verification methods:
- Salesforce Authenticator
- One-Time Password Generator
- Security Key
- Built-In Authenticator
- Recovery Codes
Which of these verification methods should you choose?
Salesforce is the parent company that acquired Heroku in 2010, which is why they promote their proprietary mobile app as your first choice. If you’re already using another authenticator app elsewhere, however, then choose the One-Time Password Generator option and scan the QR code with your app.
The Security Key requires an external hardware USB token, while the Built-In Authenticator method can take advantage of your device’s fingerprint reader, for example, if it comes with one.
Finally, the Recovery Codes can work as an additional password. Even if you’re only planning to use an authenticator app on your phone, you should download the recovery codes as a backup. Without an alternative way to verify your identity, you won’t be able to log in to your Heroku account ever again if you lose, damage, or upgrade your phone. Trust me, I’ve been there!
Heroku used to offer another verification method through SMS sent to your phone, but they discontinued it due to security concerns around it.
Add a Payment Method (Optional)
If you don’t feel comfortable sharing your credit card number with Heroku, then that’s okay. The service will continue to work for free, with reasonable restrictions. However, even if you don’t plan to ever spend a dime on hosting your Django project in the cloud, you still might consider hooking up your payment details. Here’s why.
At the time of writing this tutorial, you’ll get only 550 hours per month with the free account. That’s about 22 days of using a single computer instance 24 hours per day. When you verify your account with a credit card, then that pool climbs up to a generous 1,000 free hours per month.
Note: Regardless of whether you verify your account or not, web applications on the free tier that don’t receive any HTTP traffic within a 30-minute window automatically go to sleep. This conserves your pool of free hours but can make the user experience worse if your app doesn’t get regular traffic. When someone wants to use your web application while it’s in standby mode, it will take a few seconds to spin up again.
Other benefits of verifying your account include the possibilities of using free add-ons such as a relational database, setting up a custom domain, and more. Just remember that if you decide to share your billing information with Heroku, then enabling multi-factor authentication is a worthwhile exercise.
So far, you’ve been interacting with Heroku through their web interface. While this is undoubtedly convenient and intuitive, the fastest way of hosting your Django project online is to use the command line.
Step 4: Install the Heroku CLI
Working in the terminal is an essential skill for any developer. Typing commands might seem intimidating at first, but it becomes second nature after seeing its power. For a seamless developer experience, you’ll want to install the Heroku Command-Line Interface (CLI).
The Heroku CLI will let you create and manage your web applications right from the terminal. In this step, you’ll learn a few essential commands and how to display their documentation. First, follow the installation instructions for your operating system. When done, confirm that the installation was successful with the following command:
$ heroku --version
If the heroku command was found and you’re on the latest version of the Heroku CLI, then you can enable autocomplete in your shell. It will automatically complete commands and their arguments when you press the Tab key, which saves time and prevents typos.
Note: The tool requires a Node.js server, which most of the installation methods bundle. It’s also an open source project, which means you can take a look at its source code on GitHub.
The Heroku CLI has a modular plugin architecture, which means that its features are self-contained and follow the same pattern. To get a list of all available commands, type heroku help or simply heroku in your terminal:
$ heroku
CLI to interact with Heroku

VERSION
  heroku/7.56.0 linux-x64 node-v12.21.0

USAGE
  $ heroku [COMMAND]

COMMANDS
  access          manage user access to apps
  addons          tools and services for developing, extending, (...)
  apps            manage apps on Heroku
  auth            check 2fa status
(...)
Sometimes, the name of a command may not give away what it does. If you want to find out more details about a particular command and see quick examples of usage, when available, then use the --help flag:
$ heroku auth --help
check 2fa status

USAGE
  $ heroku auth:COMMAND

COMMANDS
  auth:2fa     check 2fa status
  auth:login   login with your Heroku credentials
  auth:logout  clears local login credentials and invalidates API session
  auth:token   outputs current CLI authentication token.
  auth:whoami  display the current logged in user
Here, you’re asking for more information about the auth command by using the --help flag. You can see that auth should be followed by a colon (:) and another command. By typing heroku auth:2fa, you’re asking the Heroku CLI to check the status of your two-factor authentication setup:
$ heroku auth:2fa --help
check 2fa status

USAGE
  $ heroku auth:2fa

ALIASES
  $ heroku 2fa
  $ heroku twofactor

COMMANDS
  auth:2fa:disable  disables 2fa on account
The Heroku CLI commands are hierarchical. They will often have one or more subcommands that you can specify after a colon, like in the example above. Additionally, some of those subcommands may have an alias available at the top level of the command hierarchy. For instance, typing heroku auth:2fa has the same effect as heroku 2fa or heroku twofactor:
$ heroku auth:2fa
Two-factor authentication is enabled

$ heroku 2fa
Two-factor authentication is enabled

$ heroku twofactor
Two-factor authentication is enabled
All three commands give the same result, which lets you choose the one that’s easier to remember.
In this short section, you installed the Heroku CLI on your computer and got acquainted with its syntax. You’ve seen some handy commands. Now, to get the most out of this command-line tool, you’ll need to log in to your Heroku account.
Step 5: Log In With the Heroku CLI
You can install the Heroku CLI even without creating a Heroku account. However, you have to verify your identity and prove that you have a corresponding Heroku account to do something meaningful with it. In some cases, you might even have more than one account, so logging in allows you to specify which one to use at a given moment.
As you’ll learn later, you don’t stay logged in permanently. It’s a good habit to log in to make sure that you have access and to make sure you’re using the right account. The most straightforward way to log in is through the heroku login command:
$ heroku login
heroku: Press any key to open up the browser to login or q to exit:
This will open your default web browser and neatly obtain your session cookies if you had logged in to the Heroku dashboard before. Otherwise, you’ll need to provide your username, password, and potentially another proof of identity if you enabled two-factor authentication. After a successful login, you can close the tab or the browser window and go back to the terminal.
Note: You can also log in using the headless mode by appending the --interactive flag to the command, which will prompt you for the username and password instead of starting a web browser. However, this won’t work with multi-factor authentication enabled.
The exposure of your session cookies is temporary when you log in using the CLI because Heroku generates a new authorization token that will be valid for a limited time. It stores the token in the standard .netrc file in your home directory, but you can also inspect it using the Heroku dashboard or heroku auth and heroku authorizations plugins:
$ heroku auth:whoami
jdoe@company.com

$ heroku auth:token
 ›   Warning: token will expire today at 11:29 PM
 ›   Use heroku authorizations:create to generate a long-term token
f904774c-ffc8-45ae-8683-8bee0c91aa57

$ heroku authorizations
Heroku CLI login from 54.239.28.85  059ed27c-d04a-4349-9dba-83a0169277ae  global

$ heroku authorizations:info 059ed27c-d04a-4349-9dba-83a0169277ae
Client:      <none>
ID:          059ed27c-d04a-4349-9dba-83a0169277ae
Description: Heroku CLI login from 54.239.28.85
Scope:       global
Token:       f904774c-ffc8-45ae-8683-8bee0c91aa57
Expires at:  Fri Jul 02 2021 23:29:01 GMT+0200 (Central European Summer Time) (in about 8 hours)
Updated at:  Fri Jul 02 2021 15:29:01 GMT+0200 (Central European Summer Time) (1 minute ago)
The expiration policy seems a bit glitchy at the time of writing this tutorial. The official documentation states that it should remain valid for one year by default, while the Heroku CLI shows about one month, which also corresponds to the session cookie expiration. Regenerating the token manually using the Heroku web interface reduces it to about eight hours. But if you test what the actual expiration date is, you would see that it’s entirely different. Feel free to explore this yourself if you’re curious about the expiration policy at the time that you’re following this tutorial.
Anyway, the heroku login command is meant for development only. In a production environment, you’d typically generate a long-lived user authorization that never expires with the authorizations plugin. It can become handy for scripting and automation purposes through the Heroku API.
Step 6: Create a Heroku App
In this step, you’ll create your first Heroku app and learn how it integrates with Git. By the end, you’ll have a publicly available domain address for your project.
In a Django project, apps are independent units of code that encapsulate reusable pieces of functionality. On the other hand, Heroku apps work like scalable virtual computers capable of hosting your entire Django project. Every app consists of the source code, a list of dependencies that must be installed, and the commands to run your project.
At the very minimum, you’ll have one Heroku app per project, but it’s not uncommon to have more. For example, you may want to run the development, staging, and production versions of your project all at the same time. Each can be hooked up to different data sources and have a different set of features.
Note: Heroku pipelines let you create, promote, and destroy apps on demand to facilitate a continuous delivery workflow. You can even hook up GitHub so that every feature branch will receive a temporary app for testing.
To create your first app using the Heroku CLI, make sure that you’re already logged in to Heroku, and run either the heroku apps:create command or its alias:
$ heroku create
Creating app... done, ⬢ polar-island-08305
https://polar-island-08305.herokuapp.com/ | https://git.heroku.com/polar-island-08305.git
By default, it chooses a random app name that’s guaranteed to be unique, such as polar-island-08305. You can choose your own, too, but it has to be universally unique across the entire Heroku platform because it’s a part of the domain name that you get for free. You’ll quickly find out if it’s already taken:
$ heroku create portfolio-project
Creating ⬢ portfolio-project... !
 ▸    Name portfolio-project is already taken
If you think about how many people use Heroku, it’s not a big surprise that someone has already created an app with the name portfolio-project. When you run the heroku create command inside a Git repository, Heroku automatically adds a new remote server to your .git/config file:
$ tail -n3 .git/config
[remote "heroku"]
    url = https://git.heroku.com/polar-island-08305.git
    fetch = +refs/heads/*:refs/remotes/heroku/*
The last three rows in your Git configuration file define a remote server named heroku, which points to your unique Heroku app.
Typically, you’ll have one remote server—for example, on GitHub or Bitbucket—in your Git configuration after cloning a repository. However, there can be multiple Git remotes in a local repository. You’ll use that feature later to make new app releases and deployments to Heroku.
Note: Sometimes, working with Git can get messy. If you notice that you accidentally created a Heroku app outside your local Git repository or through the web interface, then you can still add the corresponding Git remote manually. First, change your directory to the project root folder. Next, list your apps to find the desired name:
$ heroku apps
=== jdoe@company.com Apps
fathomless-savannah-61591
polar-island-08305
sleepy-thicket-59477
After you’ve identified the name of your app—in this case, polar-island-08305—you can use the git remote add command or the corresponding git plugin in the Heroku CLI to add a remote named heroku:
$ heroku git:remote --app polar-island-08305
set git remote heroku to https://git.heroku.com/polar-island-08305.git
This will add a remote server named heroku unless specified otherwise.
When you created a new app, it told you its public web address in the .herokuapp.com domain. In this tutorial, the public web address was https://polar-island-08305.herokuapp.com, but yours will be different. Try navigating your web browser to your unique domain and see what happens next. If you can’t remember the exact URL, just type the heroku open command in the terminal while you’re in the project root folder. It will open a new browser window and fetch the right resource:
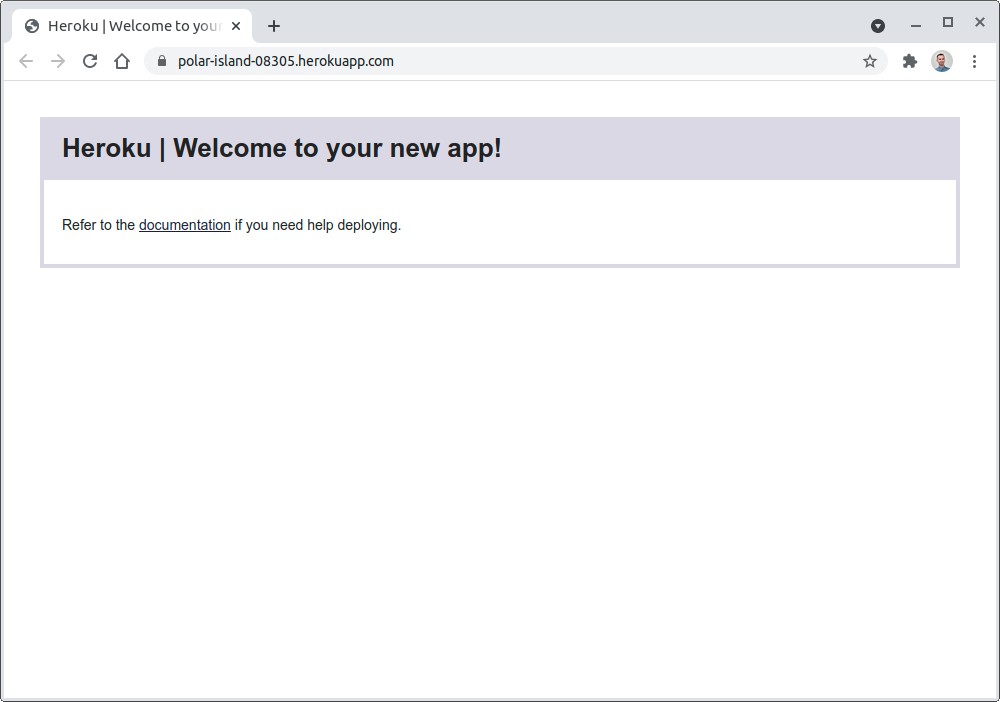
Great job! Your Heroku app is already responding to HTTP requests. However, it’s currently empty, which is why Heroku displays a generic placeholder view instead of your content. Let’s deploy your Django project into this blank app.
Step 7: Deploy Your Django Project to Heroku
At this point, you have everything you need to start hosting your Django project on Heroku. However, if you tried deploying your project to Heroku now, it’d fail because Heroku doesn’t know how to build, package, and run your project. It also doesn’t know how to install the specific Python dependencies listed in your requirements file. You’ll fix that now.
Choose a Buildpack
Heroku automates a lot of the deployment steps, but it needs to know your project setup and the technology stack. The recipe to build and deploy a project is known as a buildpack. There are already a few official buildpacks available for many backend technologies, including Node.js, Ruby, Java, PHP, Python, Go, Scala, and Clojure. Apart from that, you can find third-party buildpacks for less popular languages such as C.
You can set one manually when you create a new app or you can let Heroku detect it based on the files in your repository. One way for Heroku to recognize a Python project is by looking for the requirements.txt file in your project root directory. Make sure that you’ve created one, which you may have done with pip freeze when setting up your virtual environment, and that you’ve committed it to the local repository.
Some other files that will help Heroku recognize a Python project are Pipfile and setup.py. Heroku will also recognize the Django web framework and provide special support for it. So if your project includes requirements.txt, Pipfile, or setup.py, then there’s usually no action required to set a buildpack unless you’re dealing with some edge case.
Choose the Python Version (Optional)
By default, Heroku will pick a recent Python version to use to run your project. However, you can specify a different version of the Python interpreter by placing a runtime.txt file in your project root directory, remembering to commit it:
$ echo python-3.9.6 > runtime.txt
$ git add runtime.txt
$ git commit -m "Request a specific Python version"
Note that your Python version must include all major.minor.patch components of the semantic versioning. While there are only a few supported runtimes for Python, you can usually tweak the patch version. There’s also beta support for PyPy.
Specify Processes to Run
Now that Heroku knows how to build your Django project, it needs to know how to run it. A project can be comprised of multiple components such as the web component, background workers, relational database, NoSQL database, scheduled jobs, and so on. Every component runs in a separate process.
There are four primary process types:
web: Receives the HTTP trafficworker: Performs work in the backgroundclock: Executes a scheduled jobrelease: Runs a task before deployment
In this tutorial, you’ll only look at the web process because every Django project needs at least one. You can define it in a file named Procfile, which must be placed in your project root directory:
portfolio-project/
│
├── .git/
│
├── portfolio/
│   ├── __init__.py
│   ├── asgi.py
│   ├── settings.py
│   ├── urls.py
│   └── wsgi.py
│
├── venv/
│
├── .gitignore
├── db.sqlite3
├── manage.py
├── Procfile
├── requirements.txt
└── runtime.txt
The Procfile is a single, language-agnostic format for defining the processes making up your project. It will instruct Heroku on how to run your web server. Although working with the built-in development server isn’t the recommended practice for running a Django project in production, you can use it for this exercise:
$ echo "web: python manage.py runserver 0.0.0.0:\$PORT" > Procfile
$ git add Procfile
$ git commit -m "Specify the command to run your project"
To make the server accessible from the world outside of the Heroku cloud, you specify the address as 0.0.0.0 instead of the default localhost. It will bind the server on a public network interface. Heroku provides the port number through the PORT environment variable.
You can now test this configuration by running your Django project locally using the Heroku CLI:
$ heroku local
By default, if you don’t specify a process type explicitly, it’ll run the web process. The heroku local command is the same as heroku local web. Also, if you don’t set the port number with the --port flag, then it’ll use the default port 5000.
You’ve now specified the processes you want Heroku to run. When you open the URL http://localhost:5000/ in your web browser, then you should see the familiar rocket on the Django welcome page again. However, to access the same resource through the public interface at http://0.0.0.0:5000/, you’ll need to tweak the Django configuration, or else you’ll receive a Bad Request error.
Configure Django
You built a bare-bones Django project earlier, and now it’s time to configure it so that it’s ready to run on your Heroku instance. Configuring a Django project lets you fine-tune various settings ranging from database credentials to the template engine.
To access your Django project through a non-local network address, you need to specify ALLOWED_HOSTS in your project settings. Other than that, the Django buildpack for Python runs the collectstatic command for you, which requires the STATIC_ROOT option to be defined. Regardless of whether you use Heroku or not, there are a few more configuration options to be changed when deploying a Django project, but they aren’t mandatory at this stage.
Instead of configuring Django by hand, you can take a shortcut and install a convenient django-heroku package that will take care of all that and more.
Note: The package django-heroku is no longer maintained, and the corresponding GitHub repository was archived. It might not be an issue if you only want to get your feet wet with deploying a Django project to Heroku. However, for a production-grade application, you can try a fork called django-on-heroku, which Adam suggested in the comments section below. Alternatively, you can use an experimental buildpack described by Eric Matthes on his blog.
Make sure you’re in the right virtual environment before proceeding, and remember to refresh your requirements file when done:
(portfolio) $ python -m pip install django-heroku
(portfolio) $ python -m pip freeze > requirements.txt
This will replace your requirements file’s content with the most recent dependencies of the project. Next, append these two lines of Python code to your portfolio/settings.py file, and don’t forget to return to the project root folder afterward:
(portfolio) $ pushd portfolio/
(portfolio) $ echo "import django_heroku" >> settings.py
(portfolio) $ echo "django_heroku.settings(locals())" >> settings.py
(portfolio) $ popd
Alternatively, use cd portfolio/ and cd .. instead of the pushd and popd commands if they don’t work in your shell.
Because you appended the output of the echo commands with append redirection operators (>>) above, you now have two lines of code at the very bottom of your Django settings file:
# portfolio/settings.py

# ...

import django_heroku
django_heroku.settings(locals())
This will update the variables in your local namespace with values based on your project layout and the environment variables. Finally, don’t forget to commit your changes to the local Git repository:
(portfolio) $ git commit -am "Automatic configuration with django-heroku"
Now, you should be able to access your Django web server using the 0.0.0.0 hostname. Without it, you wouldn’t be able to visit your app through the public Heroku domain.
Configure the Heroku App
You chose a buildpack and a Python version for your project. You also specified the web process to receive HTTP traffic and configured your Django project. The last configuration step before deploying your Django project to Heroku requires setting up environment variables on a remote Heroku app.
Regardless of your cloud provider, it’s important to take care of configuration management. In particular, sensitive information such as database passwords or the secret key used to cryptographically sign Django sessions must not be stored in the code. You should also remember to disable the debug mode as it can make your site vulnerable to hacker attacks. However, keep it as is for this tutorial as you won’t have any custom content to show.
A common means for passing such data are environment variables. Heroku lets you manage the environment variables of an app through the heroku config command. For example, you might want to read the Django secret key from an environment variable instead of hard-coding it in the settings.py file.
Since you installed django-heroku, you can let it handle the details. It detects the SECRET_KEY environment variable and uses it to set the Django secret key for cryptographic signing. It’s crucial to keep that secret key safe. In portfolio/settings.py, find the auto-generated line where Django defines the SECRET_KEY variable and comment it out:
# SECURITY WARNING: keep the secret key used in production secret!
# SECRET_KEY = 'django-insecure-#+^6_jx%8rmq9oa(frs7ro4pvr6qn7...
Instead of commenting out the SECRET_KEY variable, you could also remove it altogether. But hold your horses for now, because you might need it in a second.
When you try running heroku local now, it’ll complain that the Django secret key is not defined anymore, and the server won’t start. To resolve this, you could set the variable in your current terminal session, but it’s more convenient to create a special file named .env with all your variables for local testing. The Heroku CLI will recognize this file and load the environment variables defined in it.
Note: Git shouldn’t track the .env file you just created. It should already be listed in your .gitignore file as long as you followed the earlier steps and used the gitignore.io website.
A quick way to generate a random secret key is to use the OpenSSL command-line tool:
$ echo "SECRET_KEY=$(openssl rand -base64 32)" > .env
If you don’t have OpenSSL installed on your computer and you’re on a Linux machine or macOS, then you could also generate the secret key with the Unix pseudorandom number generator:
$ echo "SECRET_KEY=$(head -c 32 /dev/urandom | base64)" > .env
Either of these two methods will ensure a truly random secret key. You might feel tempted to use a much less secure tool such as md5sum and seed it with the current date, but this isn’t really secure because an attacker could enumerate possible outputs.
If none of the commands above work on your operating system, then uncomment the SECRET_KEY variable from portfolio/settings.py temporarily and start the Django shell in your active virtual environment:
(portfolio) $ python manage.py shell
Once there, you’ll be able to generate a new random secret key using Django’s built-in management utilities:
>>> from django.core.management.utils import get_random_secret_key
>>> print(get_random_secret_key())
6aj9il2xu2vqwvnitsg@!+4-8t3%zwr@$agm7x%o%yb2t9ivt%
Grab that key and use it to set the SECRET_KEY variable in your .env file:
$ echo 'SECRET_KEY=6aj9il2xu2vqwvnitsg@!+4-8t3%zwr@$agm7x%o%yb2t9ivt%' > .env
The heroku local command picks up environment variables defined in your .env file automatically, so it should be working as expected now. Remember to comment out the SECRET_KEY variable again if you uncommented it!
The final step is specifying a Django secret key for the remote Heroku app:
$ heroku config:set SECRET_KEY='6aj9il2xu2vqwvnitsg@!+4-8t3%zwr@$agm7x%o%yb2t9ivt%'
Setting SECRET_KEY and restarting ⬢ polar-island-08305... done, v3
SECRET_KEY: 6aj9il2xu2vqwvnitsg@!+4-8t3%zwr@$agm7x%o%yb2t9ivt%
This will permanently set a new environment variable on the remote Heroku infrastructure, which will immediately become available to your Heroku app. You can reveal those environment variables in the Heroku dashboard or with the Heroku CLI:
$ heroku config
=== polar-island-08305 Config Vars
SECRET_KEY: 6aj9il2xu2vqwvnitsg@!+4-8t3%zwr@$agm7x%o%yb2t9ivt%

$ heroku config:get SECRET_KEY
6aj9il2xu2vqwvnitsg@!+4-8t3%zwr@$agm7x%o%yb2t9ivt%
Later, you can overwrite it with another value or delete it completely. Rotating secrets often is a good idea to mitigate security threats. Once a secret leaks, you should change it quickly to prevent unauthorized access and limit the damage.
Make an App Release
You might have noticed that configuring the environment variable with the heroku config:set command produced a peculiar "v3" string in the output, which resembles a version number. That’s not a coincidence. Every time you modify your app by deploying new code or changing the configuration, you’re creating a new release, which increments that v-number you saw earlier.
To list a chronological history of your app releases, use the Heroku CLI again:
$ heroku releases
=== polar-island-08305 Releases - Current: v3
v3  Set SECRET_KEY config vars  jdoe@company.com  2021/07/02 14:24:29 +0200 (~ 1h ago)
v2  Enable Logplex              jdoe@company.com  2021/07/02 14:19:56 +0200 (~ 1h ago)
v1  Initial release             jdoe@company.com  2021/07/02 14:19:48 +0200 (~ 1h ago)
The items on the list are sorted from newest to oldest. The release number always increments. Even when you roll back your app to a previous version, it will create a new release to preserve the complete history.
Making new app releases with Heroku boils down to committing the code to your local Git repository and then pushing your branch to a remote Heroku server. However, before you do, always double-check the git status for any uncommitted changes, and add them to the local repository as necessary, for example:
$ git status
On branch master
Changes not staged for commit:
  (use "git add <file>..." to update what will be committed)
  (use "git restore <file>..." to discard changes in working directory)
    modified:   portfolio/settings.py

no changes added to commit (use "git add" and/or "git commit -a")

$ git add .
$ git commit -m "Remove a hardcoded Django secret key"
While you can push any local branch, it must be pushed to a specific remote branch for the deployment to work. Heroku only deploys from either the remote main or master branches. If you’ve followed along and created your repository with the git init command, then your default branch should be named master. Alternatively, if you created it on GitHub, then it will be named main.
Since both the main and master branches exist on the remote Heroku server, you can use a shorthand syntax to trigger the build and deployment:
$ git push heroku master
Here, master refers to both your local and remote branch. If you’d like to push a different local branch, then specify its name, such as bugfix/stack-overflow, followed by a colon (:) and the remote target branch:
$ git push heroku bugfix/stack-overflow:master
Let’s push the default branch to Heroku now and see what happens next:
$ git push heroku master
(...)
remote: Compressing source files... done.
remote: Building source:
remote:
remote: -----> Building on the Heroku-20 stack
remote: -----> Determining which buildpack to use for this app
remote: -----> Python app detected
remote: -----> Using Python version specified in runtime.txt
remote: -----> Installing python-3.9.6
remote: -----> Installing pip 20.2.4, setuptools 47.1.1 and wheel 0.36.2
remote: -----> Installing SQLite3
remote: -----> Installing requirements with pip
(...)
remote: -----> Compressing...
remote:        Done: 60.6M
remote: -----> Launching...
remote:        Released v6
remote:        https://polar-island-08305.herokuapp.com/ deployed to Heroku
remote:
remote: Verifying deploy... done.
To https://git.heroku.com/polar-island-08305.git
 * [new branch]      master -> master
Pushing code to Heroku is just like pushing to GitHub, Bitbucket, or another remote Git server. Apart from that, however, it also starts the build process along the way. Heroku will determine the right buildpack based on your project files. It will use the Python interpreter specified in your runtime.txt file and install dependencies from requirements.txt.
In practice, it’s more convenient to push your code only once to the Git server of your choice, such as GitHub, and let it trigger the build on Heroku through a webhook. You can read about GitHub Integration in Heroku’s official documentation if you’d like to explore that further.
Note: The first time you push code to Heroku, it may take a while because the platform needs to spin up a new Python environment, install the dependencies, and build an image for its containers. However, subsequent deployments will be faster as the installed dependencies will be already cached.
You can navigate your browser to the public URL of the Heroku app. Alternatively, typing the heroku open command in your terminal will do it for you:
Congratulations! You’ve just made your project publicly available.
Step 8: Set Up a Relational Database
Well done! You’re almost finished with setting up the hosting for your Django project on Heroku. There’s one final piece of the equation, so hang on for a minute or two.
Up until now, you’ve been using a file-based SQLite database preconfigured by Django. It’s suitable for testing on your local computer but won’t work in the cloud. Heroku has an ephemeral file system, which forgets all changes since your last deployment or a server restart. You need a standalone database engine to persist your data in the cloud.
In this tutorial, you’ll be using a free PostgreSQL instance offered by Heroku as a fully-managed database as a service. You can use a different database engine if you want, but PostgreSQL usually doesn’t require additional configuration.
Provision a PostgreSQL Server
When Heroku detects the Django framework in your project, it automatically spins up a free but limited PostgreSQL instance. It sets up the DATABASE_URL environment variable with a public URL for your app’s database. The provisioning takes place when you first deploy your app, which can be confirmed by checking the enabled add-ons and configuration variables:
$ heroku addons

Add-on                                            Plan       Price  State
────────────────────────────────────────────────  ─────────  ─────  ───────
heroku-postgresql (postgresql-trapezoidal-06380)  hobby-dev  free   created
 └─ as DATABASE

The table above shows add-ons and the attachments to the current app (...)

$ heroku config
=== polar-island-08305 Config Vars
DATABASE_URL: postgres://ytfeiommjakmxb...amazonaws.com:5432/dcf99cdrgdaqba
SECRET_KEY:   6aj9il2xu2vqwvnitsg@!+4-8t3%zwr@$agm7x%o%yb2t9ivt%
Normally, you’d need to use that variable in portfolio/settings.py explicitly, but since you installed the django-heroku module, there’s no need to specify the database URL or the username and password. It’ll automatically pick up the database URL from the environment variable and configure the settings for you.
Moreover, you don’t have to install a database driver to connect to your PostgreSQL instance provisioned by Heroku. On the other hand, it’s desirable to do local development against the same type of database that’s used in the production environment. It promotes parity between your environments and lets you take advantage of the advanced features provided by a given database engine.
When you installed django-heroku, it already fetched psycopg2 as a transitive dependency:
(portfolio) $ pip list
Package         Version
--------------- -------
asgiref         3.4.1
dj-database-url 0.5.0
Django          3.2.5
django-heroku   0.3.1
pip             21.1.3
psycopg2        2.9.1
pytz            2021.1
setuptools      56.0.0
sqlparse        0.4.1
whitenoise      5.2.0
psycopg2 is a Python driver for the PostgreSQL database. Since the driver is already present in your environment, you’re ready to start using PostgreSQL in your app right away.
On the free hobby-dev plan, Heroku imposes some limits. You can have at most 10,000 rows that must fit 1 GB of storage. You can’t have more than 20 connections to your database. There’s no cache, and the performance is capped, among many other constraints.
At any time, you can use the heroku pg command to view the details about your PostgreSQL database provisioned by Heroku:
$ heroku pg
=== DATABASE_URL
Plan:                  Hobby-dev
Status:                Available
Connections:           1/20
PG Version:            13.3
Created:               2021-07-02 08:55 UTC
Data Size:             7.9 MB
Tables:                0
Rows:                  0/10000 (In compliance) - refreshing
Fork/Follow:           Unsupported
Rollback:              Unsupported
Continuous Protection: Off
Add-on:                postgresql-trapezoidal-06380
This short summary contains information about the current number of connections, your database size, the number of tables and rows, and so on.
In the following subsection, you’ll find out how to do something useful with your PostgreSQL database on Heroku.
Update Remote Database Schema
When you define new models in your Django apps, you typically make new migration files and apply them against a database. To update your remote PostgreSQL instance’s schema, you need to run the same migration commands as before, only on the Heroku environment. You’ll see the recommended way of doing this later, but for now, you can run the appropriate command manually:
$ heroku run python manage.py migrate
Running python manage.py migrate on ⬢ polar-island-08305... up, run.1434 (Free)
Operations to perform:
  Apply all migrations: admin, auth, contenttypes, sessions
Running migrations:
  Applying contenttypes.0001_initial... OK
  Applying auth.0001_initial... OK
(...)
The run plugin starts a temporary container called a one-off dyno, which is similar to a Docker container that has access to your app’s source code and its configuration. Since dynos are running Linux containers, you can execute any command in one of them, including an interactive terminal session:
$ heroku run bash
Running bash on ⬢ polar-island-08305... up, run.9405 (Free)
(~) $ python manage.py migrate
Operations to perform:
  Apply all migrations: admin, auth, contenttypes, sessions
Running migrations:
  No migrations to apply.
Running the Bash shell inside a temporary dyno is a common practice to inspect or manipulate the state of your Heroku app. You can think of it as logging in to a remote server. The only difference is that you’re starting a throwaway virtual machine, which contains a copy of your project files and receives the same environment variables as your live web dyno.
However, this way of running your database migrations isn’t the most reliable because you might forget about it or make a mistake down the road. You’re better off automating this step in the Procfile by adding the highlighted line:
web: python manage.py runserver 0.0.0.0:$PORT
release: python manage.py migrate
Now, every time you make a new release, Heroku will take care of applying any pending migrations:
$ git commit -am "Automate remote migrations"
$ git push heroku master
(...)
remote: Verifying deploy... done.
remote: Running release command...
remote:
remote: Operations to perform:
remote:   Apply all migrations: admin, auth, contenttypes, sessions
remote: Running migrations:
remote:   No migrations to apply.
To https://git.heroku.com/polar-island-08305.git
   d9f4c04..ebe7bc5  master -> master
It still lets you choose whether to actually make any new migrations or not. When you’re doing a large migration that can take a while to complete, consider enabling the maintenance mode to avoid corrupting or losing the data while users are working with your app:
$ heroku maintenance:on
Enabling maintenance mode for ⬢ polar-island-08305... done
Heroku will display this friendly page while in maintenance mode:
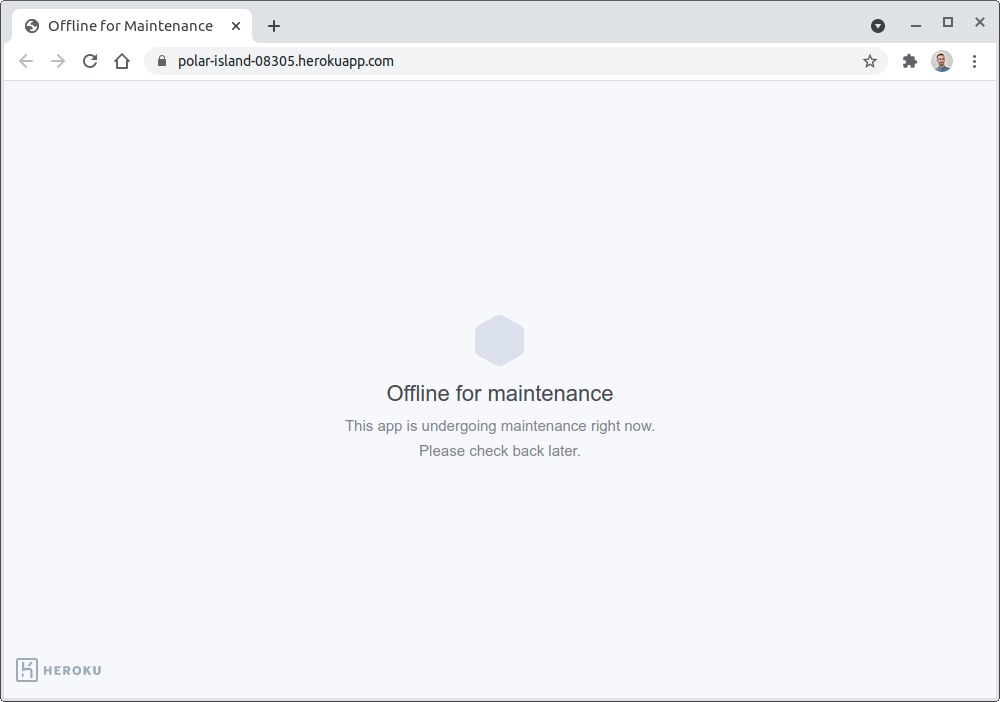
Don’t forget to disable it with heroku maintenance:off once you’re done with your migration.
Populate the Database
You’ve created the database tables for your Django models by applying migrations, but those tables remain empty for the most part. You’ll want to get some data into them sooner or later. The best way to interact with your database is through the Django admin interface. To start using it, you must first create a superuser remotely:
$ heroku run python manage.py createsuperuser
Running python manage.py createsuperuser on ⬢ polar-island-08305... up, run.2976 (Free)
Username (leave blank to use 'u23948'): admin
Email address: jdoe@company.com
Password:
Password (again):
Superuser created successfully.
Remember to create the superuser in the database hooked up to your remote Heroku app by preceding the corresponding command with heroku run. After providing a unique name and secure password for the superuser, you’ll be able to log in to the Django admin view and start adding records to your database.
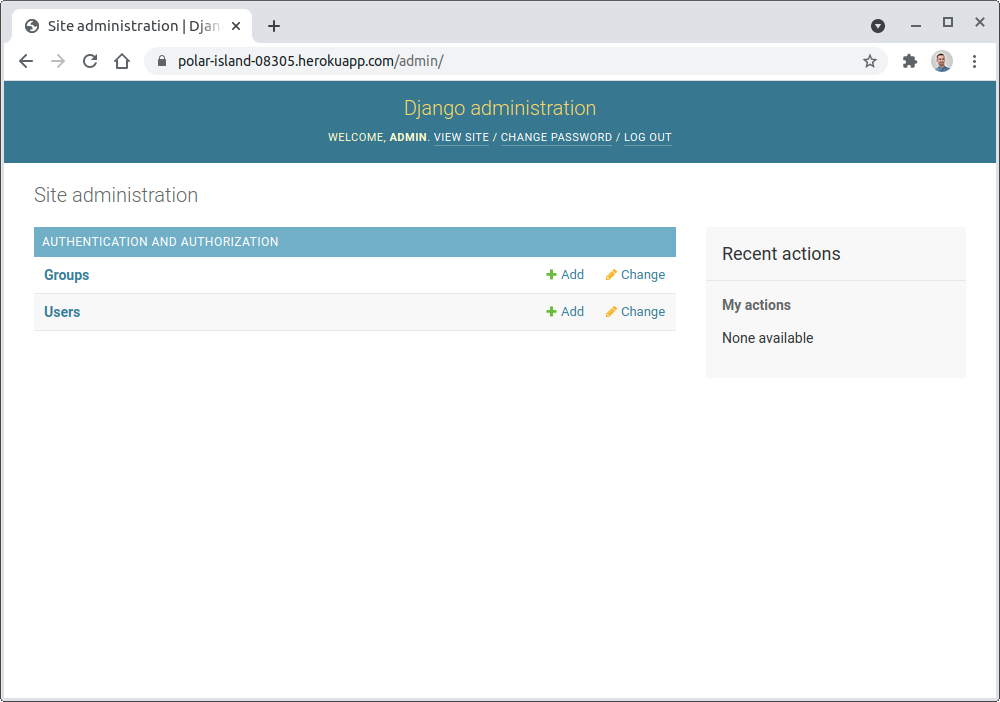
You can access the Django admin view by visiting the /admin path placed after your unique Heroku app domain name, for example:
https://polar-island-08305.herokuapp.com/admin/
Here’s how it should look after logging in:
One option to directly manipulate your remote database would be grabbing the DATABASE_URL variable from Heroku and deciphering its individual components to connect through your favorite SQL client. Alternatively, the Heroku CLI provides a convenient psql plugin, which works like the standard PostgreSQL interactive terminal but doesn’t require installing any software:
$ heroku psql
--> Connecting to postgresql-round-16446
psql (10.17 (Ubuntu 10.17-0ubuntu0.18.04.1), server 13.3 (Ubuntu 13.3-1.pgdg20.04+1))
WARNING: psql major version 10, server major version 13.
         Some psql features might not work.
SSL connection (protocol: TLSv1.3, cipher: TLS_AES_256_GCM_SHA384, bits: 256, compression: off)
Type "help" for help.

polar-island-08305::DATABASE=> SELECT username, email FROM auth_user;
 username |      email
----------+------------------
 admin    | jdoe@company.com
(1 row)
Notice how the heroku psql command connects you to the correct database on the Heroku infrastructure without requiring any details like the hostname, username, or password. Additionally, you didn’t have to install the PostgreSQL client to query one of the tables using SQL.
As a Django developer, you might be in the habit of relying on its object-relational mapper (ORM) instead of typing SQL queries manually. You can make use of the Heroku CLI again by starting the interactive Django shell in a remote Heroku app:
$ heroku run python manage.py shell
Running python manage.py shell on ⬢ polar-island-08305... up, run.9914 (Free)
Python 3.9.6 (default, Jul 02 2021, 15:33:41)
[GCC 9.3.0] on linux
Type "help", "copyright", "credits" or "license" for more information.
(InteractiveConsole)
Next, import the built-in User model and use its manager to retrieve the corresponding user objects from the database:
>>> from django.contrib.auth.models import User
>>> User.objects.all()
<QuerySet [<User: admin>]>
You should see the superuser that you created before. Using the Django shell lets you query the hooked-up database with an object-oriented API. If you don’t like the default shell, then you can install an alternative Python REPL such as IPython or bpython, and Django will recognize it.
Alright, that’s it! You have a fully-fledged Django project hosted on Heroku with a relational database hooked up. You can now share its public link in your README file on GitHub, for example, to let the world appreciate your work.
Conclusion
Now, you know how to turn your ideas into live web applications that your friends and family will love. Perhaps, someone from an HR department might stumble upon one of your projects and offer you a job. Signing up for a free Heroku account to host your Django code is one of the best ways to enter the world of cloud computing.
In this tutorial, you’ve learned how to:
- Take your Django project online in minutes
- Deploy your project to Heroku using Git
- Use a Django-Heroku integration library
- Hook your Django project up to a standalone relational database
- Manage the configuration along with sensitive data
You can download the final source code as well as the snapshots of the individual steps by following the link below:
Get Source Code: Click here to get the companion Django project as well as snapshots of the individual steps followed in this tutorial.
Next Steps
This tutorial barely scratched the surface when it comes to what’s possible with Heroku. It intentionally glossed over many fine details, but Heroku has much more to offer, even with the limited free account. Here are some ideas to consider if you want to take your project to the next level:
-
Configure a WSGI Server: Before making your project public, the first thing to do is replace the built-in Django development server with something more secure and performant, like Gunicorn. Django provides a handy deployment checklist with best practices you can go through.
-
Enable Logging: An app working in the cloud is not directly in your control, which makes debugging and troubleshooting more difficult than if it was running on your local machine. Therefore, you should enable logging with one of Heroku’s add-ons.
-
Serve static files: Use an external service such as Amazon S3 or a Content-Delivery Network (CDN) to host static resources like CSS, JavaScript, or pictures. This might offload your web server significantly and take advantage of caching for faster downloads.
-
Serve dynamic content: Due to Heroku’s ephemeral file system, data supplied to your app by the users can’t be persisted as local files. Using a relational or even a NoSQL database isn’t always the most efficient or convenient option. In such situations, you might want to use an external service like Amazon S3.
-
Add a custom domain: By default, your Heroku apps are hosted on the
.herokuapp.comdomain. While it’s quick and useful for a hobby project, you’ll probably want to use a custom domain in a more professional setting. -
Add an SSL certificate: When you define a custom domain, you’ll have to provide a corresponding SSL certificate to expose your app over HTTPS. It’s a must-have in today’s world because some web browser vendors have already announced that they won’t display insecure websites in the future.
-
Hook up with GitHub: You can automate your deployments by allowing GitHub to trigger a new build and release when a pull request is merged to the master branch. This reduces the number of manual steps and keeps your source code secure.
-
Use Heroku Pipelines: Heroku encourages you to follow the best practices with minimal effort. It provides a continuous delivery workflow by optionally automating the creation of test environments.
-
Enable Autoscaling: As your application grows, it will need to face increased demand for resources. Most e-commerce platforms experience a spike in traffic every year around Christmas. The contemporary solution to that problem is horizontal scaling, which replicates your app in multiple copies to keep up with the demand. Autoscaling can respond to such spikes whenever needed.
-
Split into microservices: Horizontal scaling works best when your project consists of multiple independent microservices, which can be scaled individually. Such an architecture can lead to faster development time but comes with its own set of challenges.
-
Migrate from Heroku: Once you get your feet wet with Heroku, you might think about migrating to another cloud platform such as Google App Engine or even the underlying Amazon infrastructure to lower your cost.
Go ahead and explore the official documentation and Python tutorials on the Heroku website to find more details about these topics.